
February 13, 2023
. 7 min readZustand Tutorial: Managing React State
Get started with Zustand in React and learn how to manage a global state efficiently.

State management is an essential topic in React. In the previous lessons, we covered the built-in global state management solutions like useState with prop drilling implementation and the context API.
These built-in solutions have their use cases in applications with low-frequency updates and when prop drilling is feasible. However, they are not practically suitable for apps with frequent global state changes that cause unnecessary re-render and when prop drilling becomes a nightmare.
That is where state management libraries like redux, zustand, jotai and recoil come in. Naturally, these libraries can re-render the app components efficiently by ensuring that only the component that references a particular state is updated.
This lesson introduces the zustand state management library in React. We will use it in our todos application and see how it behaves compared to the previous prop drilling and context API implementations.
This guide is a follow-up to the React context implementation lesson. We advise you to read that lesson first to understand the todos project structure if you are just joining the React series.
After that, let’s get started!
This React tutorial is part 13 of 17 in the React for beginners series.
- Part 1 – React Tutorial: A Comprehensive Guide for Beginners
- Part 2 – React Components and Data Model
- Part 3 – React Hooks: Managing State and Side-Effects
- Part 4 – Build React Form With This Best Practice
- Part 5 – Raising and Handling Events in React
- Part 6 – React Developer Tools: Debug and optimize React apps
- Part 7 – CSS in React: Styling React Components
- Part 8 – React Todos App: Add Editing functionality
- Part 9 – Profiling: Optimizing Performance in React
- Part 10 – Using LocalStorage with React
- Part 11 – How to Use React Icons
- Part 12 – React Context API: Managing Application State
- Part 14 – React Router: The Beginners Guide
- Part 15 – React children props: What Is It?
- Part 16 – React Toggle Button: Let’s Switch Navigation Widget
- Part 17 – Deploy React App With Vercel
Why Zustand?
Like redux, zustand also follows the immutable state model of the useState Hook to update the state. However, zustand provides a much cleaner, less boilerplate and simpler approach to managing the state. This simplicity makes it a good choice for beginners getting started with state management libraries.
Getting the Starter Project Files
We will clone a project that used the prop drilling approach to transmit global state and handlers, as we did in the previous lesson. We will then convert the prop drilling implementation to using the zustand library.
Let’s clone and run a todos project using the following command:
git clone https://github.com/Ibaslogic/react-state-mgnt-starter

cd react-state-mgnt-starter
npm install

npm run dev
The project structure is the same as in the previous lesson.
Installing Zustand Library
Let’s install the library using the following NPM command:
npm install zustand
Creating a Store
Zustand uses a store similar to that of context API, but with the difference that it doesn’t require the app’s components to be wrapped in a context provider before it can get the store data into the component tree.
Let’s create a src/store.js file and add the following starting code:
import { create } from 'zustand';
const todosStore = (set) => ({
  // state data and actions will go here
});
export const useTodosStore = create(todosStore);
We created a store by invoking the create function from the zustand library. This function takes a callback that will hold the store data (i.e. global states and actions) and, in the end, return a Hook that we assigned to useTodosStore. In the store callback, the library exposes a set function to update the state in the store.
Usually, a regular useState initialization and its corresponding handler would look like so:
const [counter, setCounter] = useState(0);

const increaseCounter = () => {
  setCounter((prev) => prev + 1)
}
With zustand, we will colocate the state and the handler within the store callback. The equivalent of the above code looks like so:
import { create } from 'zustand';
const store = (set) => ({
  counter: 0,
  increaseCounter: () => set((state) => ({ counter: state.counter + 1 })),
});
export const useStore = create(store);
Like the updater function in the useState Hook, the set function has access to the current state value via the state argument and uses that value to get the updated state.
With this implementation in mind, let’s move our todos data to the store.
Moving Todos Global Data to the Store
Like we did in the context API lesson, let’s move the global todos state and the handler functions from the TodosLogic component into the store.
Starting with the todos state and the addTodoItem handler. The store should look like so:
import { create } from 'zustand';
import { v4 as uuidv4 } from 'uuid';
const todosStore = (set) => ({
  todos: [],
  addTodoItem: (title) => {
    const newTodo = {
      id: uuidv4(),
      title: title,
      completed: false,
    };
    set((state) => ({
      todos: [...state.todos, newTodo],
    }));
  },
});
export const useTodosStore = create(todosStore);
We are now using the set function in the code to update the todos state.
Notice we did not move the functionality that persists the data in the local storage from the TodosLogic component. That is because the feature comes with the zustand library. We will implement it later in this lesson.
Next, let’s move the other handler functions from the TodosLogic component into the store:
// ...
const todosStore = (set) => ({
  // ...
  delTodo: (id) => {
    set((state) => ({
      todos: state.todos.filter((todo) => {
        return todo.id !== id;
      }),
    }));
  },
  handleChange: (id) => {
    set((state) => ({
      todos: state.todos.map((todo) => {
        if (todo.id === id) {
          return {
            ...todo,
            completed: !todo.completed,
          };
        }
        return todo;
      }),
    }));
  },
  setUpdate: (updatedTitle, id) => {
    set((state) => ({
      todos: state.todos.map((todo) => {
        if (todo.id === id) {
          todo.title = updatedTitle;
        }
        return todo;
      }),
    }));
  },
});
export const useTodosStore = create(todosStore);
Be aware the handlers now use the set function to update the todos state. Let’s ensure we save our file.
Now, we can remove all the props applied on the components tags in the TodosLogic JSX, so we now have the following:
import InputTodo from '@/components/InputTodo';
import TodosList from '@/components/TodosList';
const TodosLogic = () => {
  return (
    <div>
      <InputTodo />
      <TodosList />
    </div>
  );
};
export default TodosLogic;
As we can see, we no longer pass props around to get data down sub-components. They can consume the data directly from the store.
If we save the files, we will see a broken page. This happens because, in the TodosList component, we map through a prop from the parent component to get the individual todo item. Since the todos is now available in the store, let’s consume the data directly.
Consuming Global Data From the Store
In the components/TodosList.jsx file, let’s import useTodosStore Hook from the store and access the todos state we’ll now use to map through in the JSX. The file should look like so:
import TodoItem from '@/components/TodoItem';
import { useTodosStore } from '@/store';
const TodosList = () => {
  const todos = useTodosStore((state) => state.todos);
  return (
    <ul>
      {todos.map((todo) => (
        <TodoItem key={todo.id} itemProp={todo} />
      ))}
    </ul>
  );
};
export default TodosList;
From the useTodosStore Hook, we have access to the todos state via the function’s state argument.
Notice we removed all the props that pass global data around. Again, the data is ready to be consumed by any components. If we save the file, the application should now render. Though, some of the functionalities are still broken. We need to consume the stored data from the TodoItem and InputTodo components.
Using Store Data in the TodoItem Component
As expected, we will import useTodosStore Hook from the store and access the handlers, so we have:
// ...
import { useTodosStore } from '@/store';

const TodoItem = ({ itemProp }) => {
  const handleChange = useTodosStore((state) => state.handleChange);
  const delTodo = useTodosStore((state) => state.delTodo);
  const setUpdate = useTodosStore((state) => state.setUpdate);
  // ...
  return (
    // ...
  );
};
export default TodoItem;
Notice that we removed the props that pass global data and instead grabbed them from useTodosStore.
Using Store Data in the InputTodo Component
Let’s ensure the functionality in the InputTodo component also works. Open the components/InputTodo.jsx file and import useTodosStore from the store. Then, grab the addTodoItem handler from useTodosStore rather than via the component’s prop:
// ...
import { useTodosStore } from '@/store';
const InputTodo = () => {
  const addTodoItem = useTodosStore((state) => state.addTodoItem);
  // ...
  return (
    // ...
  );
};
export default InputTodo;
We should save the file and test the application. It should work! However, the store data does not persist on page reload like the starter project.
Remember, we removed the storage functionality while converting the code from the prop drilling implementation.
Persisting Store Data With Zustand
If we need to store the global state in storage, the persist middleware provided by the library will help. See other available middleware here.
To use the persist middleware, open the zustand store and import it from zustand/middleware. Then, wrap the todosStore with it:
// ...
import { persist } from 'zustand/middleware';
const todosStore = (set) => ({
  // ...
});
export const useTodosStore = create(
  persist(todosStore, {
    name: 'todos',
  })
);
We also provided a unique name to identify the zustand state in the storage. By default, the state will persist in the browser’s local storage. Let’s save the file and ensure the application works as expected.
To use another storage, for instance, the session storage, we will pass a function that returns the storage to the createJSONStorage:
// ...
import { persist, createJSONStorage } from 'zustand/middleware';
const todosStore = (set) => ({
  // ...
});
export const useTodosStore = create(
  persist(todosStore, {
    name: 'todos',
    storage: createJSONStorage(() => sessionStorage),
  })
);
Our project uses local storage; we will stick with the default.
Performance Improvement
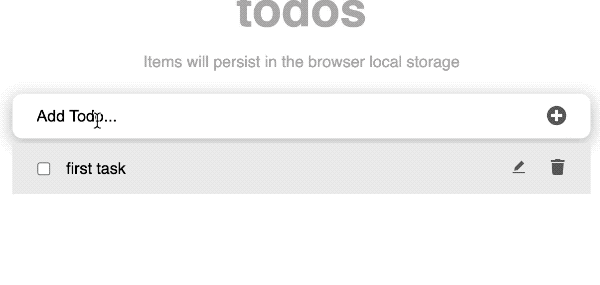
In the profiled GIF below, we can see that clicking on the checkbox and the delete button does not re-render unaffected components like the text input field. That is not the case with the previous prop drillings and context API solutions.
While this is only a small application, we expect to see many more benefits in a more extensive app.
Up next, we'll discuss routing in React applications. Final project source code.
Next part: React Router Tutorial
continue