
February 13, 2023
. 14 min readRaising and Handling Events in React
Understand the concept behind raising and handling events in React in this lesson.

In the previous lesson, we discussed handling form inputs like checkbox, text input, text area, select input, range, and radio inputs in React.
On this page, we will continue with our todos project and integrate a text input and checkbox in our application. We will also discuss a critical React concept called “raising and handling events.”
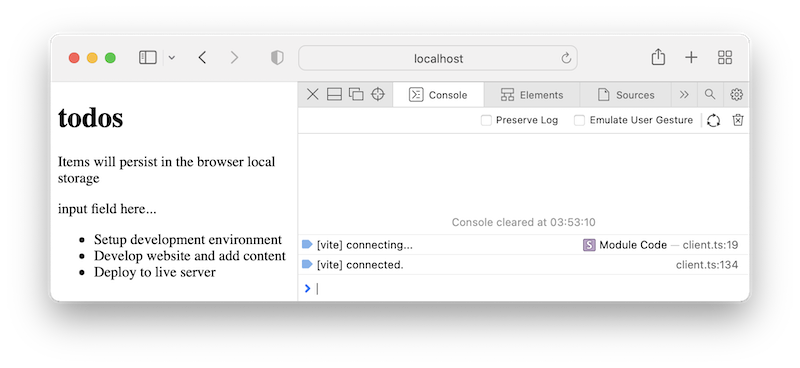
So far, this is what our application looks like:
This React tutorial is part 5 of 17 in the React for beginners series.
- Part 1 – React Tutorial: A Comprehensive Guide for Beginners
- Part 2 – React Components and Data Model
- Part 3 – React Hooks: Managing State and Side-Effects
- Part 4 – Build React Form With This Best Practice
- Part 6 – React Developer Tools: Debug and optimize React apps
- Part 7 – CSS in React: Styling React Components
- Part 8 – React Todos App: Add Editing functionality
- Part 9 – Profiling: Optimizing Performance in React
- Part 10 – Using LocalStorage with React
- Part 11 – How to Use React Icons
- Part 12 – React Context API: Managing Application State
- Part 13 – Zustand Tutorial: Managing React State
- Part 14 – React Router: The Beginners Guide
- Part 15 – React children props: What Is It?
- Part 16 – React Toggle Button: Let’s Switch Navigation Widget
- Part 17 – Deploy React App With Vercel
Adding React Checkbox Fields
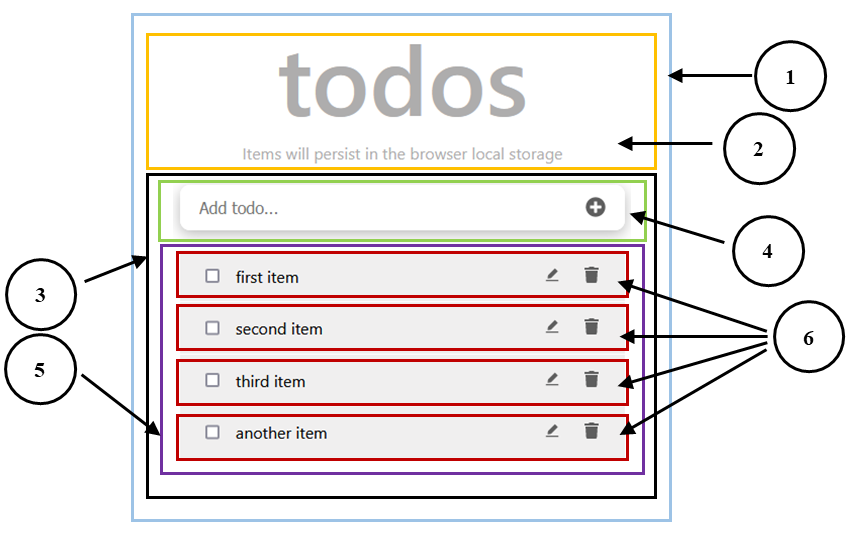
If we revisit the final project, we rendered the checkbox in the TodoItem component, label six(6) as shown below:
Let’s open the components/TodoItem.jsx file and add an input checkbox before the todo's title in the <li>:
const TodoItem = ({ itemProp }) => {
  return (
    <li>
      <input type="checkbox" />
      {itemProp.title}
    </li>
  );
};
export default TodoItem;
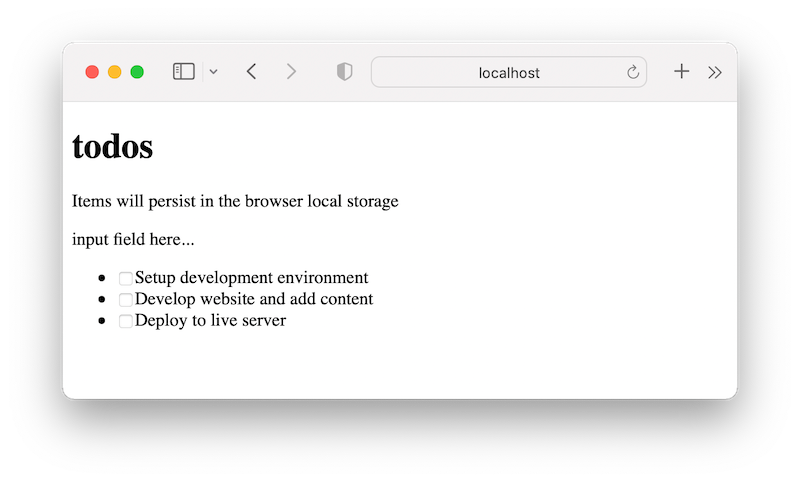
The checkbox should render like so:
Updating Todos State With useState() Hook
Before we implement the functionalities to toggle checkboxes, let’s ensure the todos items live in a component state. If we open the components/TodosLogic.jsx file, we initialized a todos variable with an array of objects data like so:
    const todos = [
      // ...
    ];
We mentioned previously that these todos data would live in a component state.
We declare a state in a component if data changes over time.
Since the todos data will change whenever we add or remove data or interact with it, let’s ensure we store it in a useState() Hook.
In the components/TodosLogic.jsx, import a useState Hook, and initialize a todos state variable like so:
import { useState } from 'react';
// other imported components here
const TodosLogic = () => {
  const [todos, setTodos] = useState([
    {
      id: 1,
      title: 'Setup development environment',
      completed: true,
    },
    {
      id: 2,
      title: 'Develop website and add content',
      completed: false,
    },
    {
      id: 3,
      title: 'Deploy to live server',
      completed: false,
    },
  ]);
  return (
    // ...
  );
};
export default TodosLogic;
If we save the file, everything should work like before.
Toggling the Checkboxes
Again, on the live project, if we toggle a checkbox, the behavior, and style of the todo's title (i.e., todos task) change. While these todos titles are rendered alongside the checkbox in the TodoItem component, they come from the parent state, i.e., the TodosLogic component state.
Updating the State When We Toggle a Checkbox
Updating the todos state in a TodosLogic component requires the setTodos updater function. Now we need to figure out a way to update the state when interacting with a checkbox in a TodoItem child component.
We can update a parent state from a child component in two different ways:
- We can pass the updater function down to the child component.
- Raise an event from the child component and handle it in the parent component where the state was created.
Let’s take a look at the first method.
Passing the setTodos to the TodoItem Child Component
In the components/TodosLogic.jsx file, let’s pass the setTodos updater function to an intermediate component, TodosList, via a prop named setTodos:
// ...
const TodosLogic = () => {
  const [todos, setTodos] = useState([
    // ...
  ]);
  return (
    <div>
      <InputTodo />
      <TodosList todosProps={todos} setTodos={setTodos} />
    </div>
  );
};
export default TodosLogic;
In the components/TodosList.jsx file, we’ll access the setTodos prop and also pass it down to the TodoItem component:
// ...
const TodosList = ({ todosProps, setTodos }) => {
  return (
    <ul>
      {todosProps.map((todo) => (
        <TodoItem key={todo.id} itemProp={todo} setTodos={setTodos} />
      ))}
    </ul>
  );
};
export default TodosList;
Finally, in the components/TodoItem.jsx file, we have access to the setTodos prop that we’ll use to update the parent state:
const TodoItem = ({ itemProp, setTodos }) => {
  return (
    <li>
      <input type="checkbox" />
      {itemProp.title}
    </li>
  );
};
export default TodoItem;
Using a Controlled Input Checkbox
To work with the checkbox, let’s control it by adding a checked and onChange attributes:
const TodoItem = ({ itemProp, setTodos }) => {
  return (
    <li>
      <input
        type="checkbox"
        checked={itemProp.completed}
        onChange={() => console.log('clicked')}
      />
      {itemProp.title}
    </li>
  );
};
export default TodoItem;
The checked attribute is a boolean attribute that tells if a checkbox is “checked” or “unchecked.” In the code, we assigned a completed property from the parent state.
Remember, we have access to the state property via
itemProp.completed.
{
  id: 1,
  title: "Setup development environment",
  completed: true,
},
If the completed property of a particular checkbox is true, the checkbox will be checked. Otherwise, it will be unchecked.
The onChange attribute lets us keep track of any changes in the checkbox. In the meantime, it invokes a function that logs a text to the console when a checkbox is clicked.
Identifying a Clicked Item
To keep track of a particular checkbox, we will pass along the id via a callback. We will update the onChange event to include an id:
const TodoItem = ({ itemProp, setTodos }) => {

  const handleChange = (id) => {
    console.log('clicked', id);
  };

  return (
    <li>
      <input
        // ...
        onChange={() => handleChange(itemProp.id)}
      />
      {itemProp.title}
    </li>
  );
};
export default TodoItem;
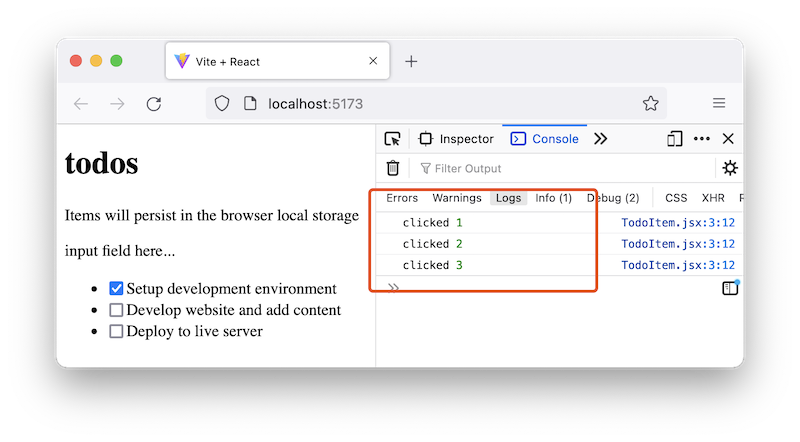
For every change in the checkbox, we call the handleChange handler with the id of that checkbox. If we save the file and click on checkboxes, we’ll see their respective ids.
Updating the State Using the setTodos Updater Function
The state updater function gives us access to the previous state as an argument of its callback. We will loop through the previous state (an array of objects) and check if any items match the one we clicked. Then, we toggle the item by switching the completed boolean value.
Let’s update the handleChange handler in the TodoItem, so we have the following:
const handleChange = (id) => {
  setTodos((prevState) =>
    prevState.map((todo) => {
      if (todo.id === id) {
        return {
          ...todo,
          completed: !todo.completed,
        };
      }
      return todo;
    })
  );
};
If we save the file, we should be able to toggle the checkboxes in the UI.
For now, let’s focus on the UI view. We will discuss what is happening in the DevTools in the next part of the series.
Raising Event From TodoItem and Handling It in the TodosLogic
Another way to update a parent state is to keep the logic for updating that state within the component holding the state. Instead of passing the updater function to the child components as we did above, we will raise an event from the child component and handle it where the state lives in the parent.
Let’s refactor the checkbox toggle implementation using this method.
First, we will move the handleChange logic from the TodoItem into the parent TodosLogic and pass it down using a prop:
const TodosLogic = () => {
  const [todos, setTodos] = useState([
    // ...
  ]);
  const handleChange = (id) => {
    setTodos((prevState) =>
      prevState.map((todo) => {
        if (todo.id === id) {
          return {
            ...todo,
            completed: !todo.completed,
          };
        }
        return todo;
      })
    );
  };
  return (
    <div>
      <InputTodo />
      <TodosList todosProps={todos} handleChange={handleChange} />
    </div>
  );
};
export default TodosLogic;
As expected, in the TodosList component, we have access to the prop, so we'll pass it down also to the TodoItem component:
const TodosList = ({ todosProps, handleChange }) => {
  return (
    <ul>
      {todosProps.map((todo) => (
        <TodoItem
          key={todo.id}
          itemProp={todo}
          handleChange={handleChange}
        />
      ))}
    </ul>
  );
};
export default TodosList;
Finally, in the TodoItem, we grab the handleChange and assign it to the onChange handler:
const TodoItem = ({ itemProp, handleChange }) => {
  return (
    <li>
      <input
        type="checkbox"
        checked={itemProp.completed}
        onChange={() => handleChange(itemProp.id)}
      />
      {itemProp.title}
    </li>
  );
};
export default TodoItem;
This should work as expected if we save the files and try to toggle the checkboxes. Both methods are acceptable and easy; we are only doing “prop drilling”.
Later in the course, we will learn how to style the todos title when we complete a task.
Adding Delete Functionalities
Similar to the toggle logic, we’ll start by adding a delete button after the checkbox in the TodoItem component:
const TodoItem = ({ itemProp, handleChange }) => {
  return (
    <li>
      <input
        type="checkbox"
        // ...
      />
      <button>Delete</button>
      {itemProp.title}
    </li>
  );
};
export default TodoItem;
Next, we will set up the functionalities that delete a state item when clicking the corresponding delete button.
In the TodosLogic component, let’s define a delTodo handler to handle the delete functionality:
const TodosLogic = () => {
  // ...
  const delTodo = (id) => {
    console.log('deleted', id);
  };
  return (
    <div>
      <InputTodo />
      <TodosList
        // ...
        delTodo={delTodo}
      />
    </div>
  );
};
export default TodosLogic;
In the meantime, we’ll log a message to the console. Notice that we also passed the handler down to the child component via a delTodo prop.
In the TodosList component, we’ll receive the prop and further pass it down to the TodoItem component:
const TodosList = ({ todosProps, handleChange, delTodo }) => {
  return (
    <ul>
      {todosProps.map((todo) => (
        <TodoItem
          // ...
          delTodo={delTodo}
        />
      ))}
    </ul>
  );
};
export default TodosList;
Finally, in the TodoItem component, we’ll grab the delTodo and assign it as a callback to a click event on the button element:
const TodoItem = ({ itemProp, handleChange, delTodo }) => {
  return (
    <li>
      <input
      // ...
      />
      <button onClick={() => delTodo(itemProp.id)}>Delete</button>
      {itemProp.title}
    </li>
  );
};
export default TodoItem;
If we save all files and click any delete buttons, we’ll see a text alongside the button id in the browser console.
Filtering the Todos List
In the delTodo handler, we’ll call the JavaScript filter() function on the todos state and return the items whose id does not match the button id we clicked. With the following code, we’ll remove the todos task whose button is clicked from the list:
const delTodo = (id) => {
  setTodos([
    ...todos.filter((todo) => {
      return todo.id !== id;
    }),
  ]);
};
We must not filter the original todos but a copy,
...todos.
If we save all files and test the project, we should be able to delete todos items.
Adding Text Input to Receive Items
In the components/InputTodo.jsx file, we have created a component called InputTodo. This component will take a user’s todos and forward it to the TodosLogic component to update the state.
Let’s render the form input in the components/InputTodo.jsx, so we have:
const InputTodo = () => {
  return (
    <form>
      <input type="text" placeholder="Add Todo..." />
      <button>Submit</button>
    </form>
  );
};
export default InputTodo;
Save the file and see the form elements rendered in the frontend.
Controlling the React Text Input
We’ll start by creating a state for the user’s input and then controlling it by adding a value and onChange attributes:
import { useState } from 'react';
const InputTodo = () => {
  const [title, setTitle] = useState('');

  const handleChange = (e) => {
    setTitle(e.target.value);
  };

  return (
    <form>
      <input
        type="text"
        placeholder="Add Todo..."
        value={title}
        onChange={handleChange}
      />
      <button>Submit</button>
    </form>
  );
};
export default InputTodo;
The code above is straightforward. Read the previous lesson if you need a refresher.
Updating the Todos State
We need to update the todos state that lives in the parent component. In the InputTodo component, we’ll trigger a submit event on the form element and invoke a handler function that sends the user’s input to the TodosLogic component to update the state.
Let’s update the InputTodo to include the submit handler:
const InputTodo = () => {
  const [title, setTitle] = useState('');
  // ...
  const handleSubmit = (e) => {
    e.preventDefault();
    console.log(title);
    setTitle('');
  };
  return (
    <form onSubmit={handleSubmit}>
      {/* ... */}
    </form>
  );
};
export default InputTodo;
To pass the user’s input to the TodosLogic, we’ll also use the prop drilling technique as we have done before. In the TodosLogic component, we’ll set up the logic for adding the user’s entry:
const TodosLogic = () => {
  // ...
  const addTodoItem = (title) => {
    // update state with user's input
  };
  return (
    <div>
      <InputTodo addTodoItem={addTodoItem} />
      {/* ... */}
    </div>
  );
};
export default TodosLogic;
We defined an addTodoItem handler that expects the user’s input and then passed the handler down to InputTodo using an addTodoItem prop.
We’ll grab the addTodoItem in the InputTodo component and pass the user’s entry as an argument:
const InputTodo = ({ addTodoItem }) => {
  const [title, setTitle] = useState('');
  // ...
  const handleSubmit = (e) => {
    e.preventDefault();
    addTodoItem(title);
    setTitle('');
  };
  return (
    // ...
  );
};
export default InputTodo;
The setTitle('') in the handleSubmit lets us clear the input field after submission for subsequent entry.
Adding the new Entry to UI
We’ll update the addTodoItem handler in the TodosLogic, so we have the following:
const addTodoItem = (title) => {
  const newTodo = {
    id: 4,
    title: title,
    completed: false,
  };
  setTodos([...todos, newTodo]);
};
All we did in the code was to get the todos items and add the new entry, including a static id and a completed property.
If we save and test our project, we should be able to add a new entry to the list.
Adding Unique Entry Keys
As seen in the GIF above, we got a console warning when we added the second entry. This is due to the static id we assigned for every todos entry:
const newTodo = {
  id: 4,
  title: title,
  completed: false,
};
Remember, we used the items ids to help React know how to uniquely identify items in a list via a key prop:
{todosProps.map((todo) => (
  <TodoItem
    key={todo.id}
    // ...
  />
))}
To fix the console warning, we will generate random ids with a package called UUID (Universal Unique Identifier).
Installing the uuid
Let’s add the package to our project with this command:
npm install uuid
After that, import the package in the components/TodosLogic.jsx file:
import { v4 as uuidv4 } from "uuid";
Then, replace every hardcoded id with uuidv4():
import { v4 as uuidv4 } from "uuid";
const TodosLogic = () => {
  const [todos, setTodos] = useState([
    {
      id: uuidv4(),
      // ...
    },

  ]);
  // ...
  const addTodoItem = (title) => {
    const newTodo = {
      id: uuidv4(),
      title: title,
      completed: false,
    };
    setTodos([...todos, newTodo]);
  };
  return (
    // ...
  );
};
export default TodosLogic;
If we save our file, we can successfully add entries without any console warning.
Preventing an Empty Submission
Let’s prevent our application from submitting an empty item. We will use the JavaScript trim() method to simplify this process. However, libraries like Formik with Yup can make form validations easier in a complex project.
The trim() method lets us remove white space from both sides of a string. We’ll use it to submit items only if they exist. Let’s update the handleSubmit in the InputTodo component, so we have the following:
const handleSubmit = (e) => {
  e.preventDefault();
  if (title.trim()) {
    addTodoItem(title);
    setTitle('');
  } else {
    alert('Please add item');
  }
};
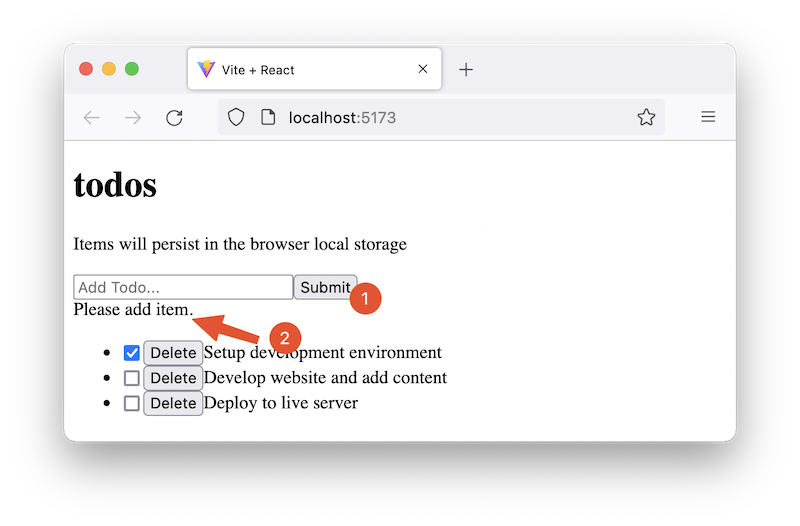
If we save the file and try to submit an empty task, an alert window will pop up with the instruction to add an item.
Adding a Warning State
We often display a warning message instead of an alert window. To do this, we will create a state for the message. The InputTodo component now looks like so:
const InputTodo = ({ addTodoItem }) => {
  const [title, setTitle] = useState('');
  const [message, setMessage] = useState('');
  // ...
  const handleSubmit = (e) => {
    e.preventDefault();
    if (title.trim()) {
      addTodoItem(title);
      setTitle('');
      setMessage('');
    } else {
      setMessage('Please add item.');
    }
  };
  return (
    <>
      <form onSubmit={handleSubmit}>
        {/* ... */}
      </form>
      <span>{message}</span>
    </>
  );
};
export default InputTodo;
In the code, we created a state and rendered the state variable after the <form> element in the return statement. We’ve wrapped the elements in an enclosing fragment, <></>, since we now return more than one JSX.
In the handleSubmit handler, we now write a warning message that displays when the user submits an empty title. We also reset the message to default, so it disappears for successful re-entry.
Let’s test our application and ensure it works as expected.
In the next part, we will introduce the React Developer Tools and discuss how we can inspect and debug a React application. See you on the next page!
Next part: React Developer Tools
continue