
February 13, 2023
. 13 min readReact Components and Data Model
This tutorial prepares you for React projects by covering React functional and class components, state, and props data models.

In the previous lesson, we learned what React is, the virtual DOM, and then set up a development environment.
Here, we’ll discuss other React fundamentals, including React components, states, and props that'll prepare us for React projects.
This React tutorial is part 2 of 17 in the React for beginners series.
- Part 1 – React Tutorial: A Comprehensive Guide for Beginners
- Part 3 – React Hooks: Managing State and Side-Effects
- Part 4 – Build React Form With This Best Practice
- Part 5 – Raising and Handling Events in React
- Part 6 – React Developer Tools: Debug and optimize React apps
- Part 7 – CSS in React: Styling React Components
- Part 8 – React Todos App: Add Editing functionality
- Part 9 – Profiling: Optimizing Performance in React
- Part 10 – Using LocalStorage with React
- Part 11 – How to Use React Icons
- Part 12 – React Context API: Managing Application State
- Part 13 – Zustand Tutorial: Managing React State
- Part 14 – React Router: The Beginners Guide
- Part 15 – React children props: What Is It?
- Part 16 – React Toggle Button: Let’s Switch Navigation Widget
- Part 17 – Deploy React App With Vercel
React Components
Recall, in the last lesson, we rendered JSX elements directly in the root like so:
root.render(
  <div>
    <h1>Hello from React application</h1>
    <img src={reactLogo} className="logo react" alt="React logo" />
  </div>
);
That practice is not sustainable.
Maintaining an application with hundreds of elements in that way would be a challenge. Instead, we will render a React component.
React applications, as we briefly mentioned in the last lesson, are built by combining pieces of encapsulated components. These components are reusable bits of code and can be function or class-based.
React Function and Class Components
A React class component is a component we create using the ES6 class syntax, while we make a function component by writing a function. This component describes the app’s behavior, including rendering the JSX element.
Like every element, the state of the JSX elements inside a component can also change. React can efficiently “react” to state changes whenever that happens to keep the DOM updated. This makes React a reactive library.
In the earlier version of React, the class component was the de facto component required to manage component state and logic. During that time, we used the function component primarily for presentation.
However, with the introduction of React Hooks in the React 16.8 version, the function component has become the default way of writing React components because it now manages state and component logic.
The React Hooks implementation in function components provides better code readability and presents a better way to reuse stateful logic between components. More on that in the React Hooks tutorial.
This React js tutorial series focuses on modern React by embracing React Hooks with function components.
Creating the Project Component’s Files
In the first lesson, we decomposed the UI of our todos application into multiple components: TodoApp, Header, TodosLogic, InputTodo, TodosList, and TodoItem.
We will arrange these components to match the structure in the UI. For instance, components that appear within another component in the UI become the child of that component. That means the Header and TodosLogic components become a direct child of the TodoApp component. The TodosLogic becomes a direct parent to InputTodo and TodosList components. Finally, the TodoItem becomes a child of TodosList.
See the structure again for reference:
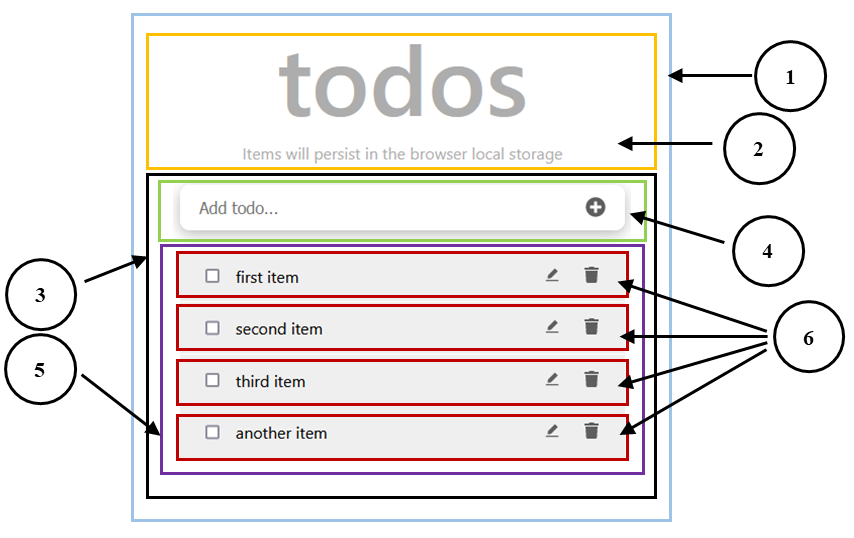
- TodoApp: the parent or root component. It holds two direct child components.
- Header: display the todos heading text.
- TodosLogic: holds the application logic. It includes two direct child components.
- InputTodo: will take the user’s input.
- TodosList: serves as a container for the todos items.
- TodoItem: renders the individual todos item.
Starting the Development Environment
Recall from the previous lesson; we mentioned that we would use Vite for our project. So let’s start the development server using npm run dev.
The files that describe what we see in the frontend live in the src folder. We will write the src files from scratch, so let’s delete all the files in the src folder. Doing that will instantly break the frontend UI. This is because the Vite setup needs an src/main.jsx entry file.
For the
create-react-appsetup, the entry file issrc/index.js.
Let’s create a main.jsx file in the src folder and add the following code:
import React from "react";
import ReactDOM from "react-dom/client";

import TodoApp from "./components/TodoApp";

const domContainer = document.getElementById("root");
const root = ReactDOM.createRoot(domContainer);
root.render(<TodoApp />);
This code is similar to what we have rendered before, except that we are now rendering our project's root component element, <TodoApp />, instead of JSX.
Notice how we imported the component using the following:
import TodoApp from "./components/TodoApp";
We don’t have the component in a file yet; we will create it in a moment. When importing components, we must specify the relative path from the current directory. The import line above implies that the TodoApp component will live in a components/TodoApp.jsx file inside the current directory, src.
See the tree representation below:
react-todo-app
    ...
    ├── src
    │    ├── components
    │    │      └── TodoApp.jsx
    │    ├── main.jsx
    ...
Let’s create a components folder in the src and add the TodoApp.jsx file. In this file, add the following component code:
const TodoApp = () => {
  return (
    <div>
      <h1>Hello world!</h1>
      <p>I am in a React Component!</p>
    </div>
  );
};
export default TodoApp;
If we save all files and see the frontend, we will see the content of the TodoApp component displayed on the screen.
Code explanation:
We started by creating the top-level component of our project, TodoApp, and rendering it to the DOM. This component is a React function component created using the ES6 arrow function. It returns the JSX or React elements that describe the UI.
Like the arrow function, we can also use a regular function to create the component. For instance, a function declaration will look like so:
function TodoApp() {
  // fn declaration
  return (
    // ...
  );
}
export default TodoApp;
And a function expression looks like so:
const TodoApp = function () {
  // fn expression
  return (
    // ...
  );
};
export default TodoApp;
Throughout the React js tutorial course, we will use the arrow function. However, we can accomplish the same result using regular functions.
Important
- We must always capitalize component names.
- Using a PascalCase for component file names is a good convention. For instance,
TodoApp.jsx.
Support for Absolute Imports
Specifying a relative path for every imported module can result in a poor developer experience. If our application grows, we may end up with something like this: "../../components/TodoApp". The problem may worsen if we change the file location, as this may warrant us updating the file paths.
To improve the developer experience, we will configure our project to support absolute paths for imported modules. Let’s open the vite.config.js in the project root and add an alias for the src directory, so we have:
// ...
import path from 'path';
export default defineConfig({
  resolve: {
    alias: {
      '@': path.resolve(__dirname, './src'),
    },
  },
  plugins: [react()],
});
For the code editor to know how to resolve the alias and add intellisense, we’ll create a jsconfig.json in the project root and add the following:
{
  "compilerOptions": {
    "baseUrl": ".",
    "paths": {
      "@/*": ["src/*"]
    }
  },
}
Save all files and update the TodoApp import in the src/main.jsx file to use absolute import like so:
import TodoApp from '@/components/TodoApp';
Now, we can reference any module, no matter how deeply nested inside the src, using @ as the base directory. If it doesn’t work, you can restart your project.
Support for Absolute Imports in a create-react-app Project
For projects setup using the CRA toolchain, we can create a jsconfig.json in the project root and add the following code:
{
  "compilerOptions": {
    "baseUrl": "src"
  },
  "include": ["src"]
}
With this configuration in a create-react-app project, we can import any module located at src/components/** like so:
import TodoApp from "components/TodoApp";
More Ibaslogic articles to read here
React Fragments and Multiple JSX
In the TodoApp component, we currently render two JSX elements, h1, and p, next to each other. In React, when we return more than one JSX element in a component, we must wrap them in an enclosing tag. In our case, we wrapped the elements inside a div.
However, there are times when we don’t want an extra node added to the DOM. Then, we can wrap the elements with a Fragment, <React.Fragment>, or use its shortcut, <></>:
    import React from 'react';

    const TodoApp = () => {
      return (
        <React.Fragment>
          <h1>Hello world!</h1>
          <p>I am in a React Component!</p>
        </React.Fragment>
      );
    };
    export default TodoApp;
Because React is present in the scope, we imported it from the react module. If we don’t want to import React, we can use the shortcut syntax <></>:
const TodoApp = () => {
  return (
    <>
      <h1>Hello world!</h1>
      <p>I am in a React Component!</p>
    </>
  );
};
export default TodoApp;
There are scenarios where we cannot use the shortcut
<></>over<React.Fragment>. We'll discuss that later in the series.
Creating Other Component Files
In the src/components folder, let’s add the following component files: Header.jsx, TodosLogic.jsx, InputTodo.jsx, TodosList.jsx, and TodoItem.jsx.
Rendering the Header and TodosLogic Components
These two components are direct children of the TodoApp component, so let’s render them. In the components/Header.jsx file, create a functional component called Header, and render JSX like so:
const Header = () => {
  return (
    <header>
      <h1>todos</h1>
      <p>Items will persist in the browser local storage</p>
    </header>
  );
};
export default Header;
Next, we will render the component in the TodoApp parent component. Let’s open the components/TodoApp.jsx file, import the Header and render it inside the return statement:
import Header from '@/components/Header';

const TodoApp = () => {
  return (
    <>
      <Header />
    </>
  );
};
export default TodoApp;
If we save our files and look at the frontend, we should see the content of the Header component.
Similarly, let’s open the components/TodosLogic.jsx file and create a component called TodosLogic with the following content:
const TodosLogic = () => {
  return (
    <div>TodosLogic content</div>
  )
}
export default TodosLogic;
In the meantime, we only render a simple text; we will update the component later. Now, let’s go back to the components/TodoApp.jsx file and render the TodosLogic below the <Header />:
// other imports here
import TodosLogic from '@/components/TodosLogic';

const TodoApp = () => {
  return (
    <>
      <Header />
      <TodosLogic />
    </>
  );
};
export default TodoApp;
Let’s save our files and ensure the content is displayed in the frontend.
React Strict Mode
The React library provides a “Strict Mode” to ensure that developers follow the React best practices while building a React application. The Strict Mode can help identify potential problems in our application during development and may log a warning message at runtime.
For now, we will enable it and move on. Occasionally, as we develop our application, we will revisit the tool. We can activate check for any part or all of our application by wrapping with the <React.StrictMode>. We will enable strict mode for the whole application by wrapping the root component. So, let’s open the src/main.jsx and update the root, so we have:
// ...
root.render(
  <React.StrictMode>
    <TodoApp />
  </React.StrictMode>
);
Let’s save the file and ensure the application still works.
The React Data Model
Understanding how data flows is crucial to building React applications. In React, every component tends to receive and pass pieces of information to other components in the tree.
For instance, a component can receive data from its parent or, in some cases, from the users. To understand the data model, we will discuss the concepts of props and states in React.
The React Props
The props in React, also called properties, can be considered attributes in an HTML element. For instance, type and value attributes in the input element below are props:
<input type="submit" value="Submit" />
We can use these props to pass information that changes the behavior of the input element. For example, changing the type attribute to type="text" changes the appearance of the input.
In React, data flows from the parent down the component tree. And the primary way to pass data down is via the props. React props, like HTML attributes, can be used to change the output of a component. When a child component receives a prop from the parent, that prop value becomes immutable that cannot be modified by the receiving component.
For that reason, we will always get the same output when we supply the same prop value to a component, thus making the component reusable in the UI without fear of uncertainty.
The React State
A state in React can be thought-off as the engine that moves a React application. In React, we declare a state in a component if data changes over time, usually by user interaction. For example, if the component needs to perform user interactions like updating an input field or remembering preceding events like toggling a button.
Unlike the prop, a React state in a component is local and specific to that component. It is not accessible to other components in the tree unless the holder decides to pass it down to the child component. When state data is passed down to a child component, it is passed as a prop and automatically treated as a prop in the receiving component.
Enjoy reading this post?
Rendering State Data
In our todos application, everything in the UI is a bunch of information. This information will also change over time and thus will be stored in a state. If we interact with the todos application and enter a task via the input field, it displays in the UI. The task can, however, be edited, deleted, or completed. We can represent the individual entry using an object that looks like so:
{
  id: 1,
  title: "first todos item",
  completed: false
},
// ...
The title represents the todos task; the completed, whose value is either true or false, will tell if a task is completed or not. The id will help React uniquely identify each of the tasks.
Identifying the Component to Place the State Data
When different components need to know about a piece of state data, we can place the state in the closest common parent.
In the todos application, for instance, the InputTodo component will receive the todos from users; TodosList will hold the list of the task; TodoItem renders the individual task and displays the checkbox, edit, and delete button that modifies the state data.
Since these components all need access to the state, we will place the state in the TodosLogic component, which is their parent. This way, the parent can pass the data down the tree to the children that need it using the props. This process is called “prop drilling.”
An alternative to using prop drilling is to use the context API or state management library. For now, we will use the prop drilling approach. Later in the series, we will cover these alternatives.
Rendering Todos Data in the UI
In the meantime, we will initialize a todos variable to hold static todos data so we can render it to the UI. When we get to the React Hooks lesson, we will use a state instead.
In the components/TodosLogic.jsx file, let’s initialize a todos variable with an array of todos objects:
const TodosLogic = () => {
  const todos = [
    {
      id: 1,
      title: 'Setup development environment',
      completed: true,
    },
    {
      id: 2,
      title: 'Develop website and add content',
      completed: false,
    },
    {
      id: 3,
      title: 'Deploy to live server',
      completed: false,
    },
  ];
  return (
    // ...
  );
};
export default TodosLogic;
To display this data, we will loop through the todos array using the JavaScript map() function and return the title of the individual todo. The returned JSX now looks like so:
const TodosLogic = () => {
  const todos = [
    // ...
  ];
  return (
    <ul>
      {todos.map((todo) => (
        <li>{todo.title}</li>
      ))}
    </ul>
  );
};
export default TodosLogic;
Notice how we used the curly braces, {} to write a valid JavaScript inside the JSX. If we save the file and look at the frontend, we should see a list like so:
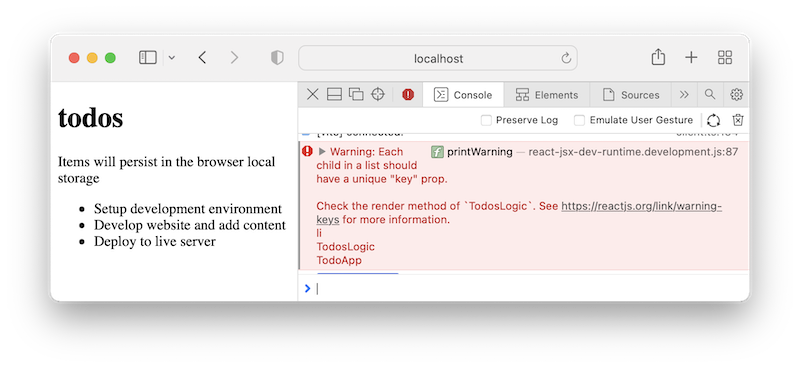
Let’s ignore the warning in the browser console; we will fix it in a moment.
Rendering the InputTodo and TodosList Components
Remember how we structured our project, the TodosLogic component will hold the InputTodo and TodosList components. Let’s open the components/InputTodo.jsx file and create a component called InputTodo with the following content:
const InputTodo = () => {
  return <div>input field here...</div>;
};
export default InputTodo;
In the meantime, we are rendering a simple text; we will update the component later. Next, let’s render the InputTodo above the ul in the TodosLogic component:
import InputTodo from '@/components/InputTodo';
const TodosLogic = () => {
  // ...
  return (
    <div>
      <InputTodo />
      <ul>
        {/* ... */}
      </ul>
    </div>
  );
};
export default TodosLogic;
Note: We wrapped the JSX with an enclosing
divtag.
Next, instead of rendering the ul list in the TodosLogic component, we will render the TodosList because it is responsible for rendering the list.
So let’s render the <TodosList /> component below the <InputTodo /> and pass the todos data down via props. The TodosLogic component now looks like this:
import InputTodo from '@/components/InputTodo';
import TodosList from '@/components/TodosList';
const TodosLogic = () => {
  const todos = [
    // ...
  ];
  return (
    <div>
      <InputTodo />
      <TodosList todosProps={todos} />
    </div>
  );
};
export default TodosLogic;
In the code, we imported TodosList, which we will create in a moment, and rendered it below the <InputTodo /> while passing the todos data via a todosProps.
Once we pass down the data, we can access it in the TodosList child component. So let’s head over to components/TodosList.jsx file and create a component called TodosList with the following content:
const TodosList = (props) => {
  return (
    <ul>
      {props.todosProps.map((todo) => (
        <li>{todo.title}</li>
      ))}
    </ul>
  );
};
export default TodosList;
As expected, we received a props object as an argument containing the todosProps. The todosProps contain the todos array data from the parent component. So we looped through it as before and rendered individual titles. If we save all files and check the frontend, we should see the items like before.
Again, this is “prop drilling” in practice! We manually get data from the parent component down to the child component via the todosProps prop.
Destructuring the Props Object
Whenever we pass a prop to a child component, it is available in the props object as key-value pair. We can use object destructuring to get the actual props like so explicitly:
const { todosProps } = props;
So the TodosList now looks like this:
const TodosList = (props) => {
  const { todosProps } = props;
  return (
    <ul>
      {todosProps.map((todo) => (
        <li>{todo.title}</li>
      ))}
    </ul>
  );
};
export default TodosList;
We are now looping through the todosProps and not props.todosProps. We can also use object destructuring directly inside the function parameter like so:
const TodosList = ({ todosProps }) => {
  return (
    <ul>
      {todosProps.map((todo) => (
        <li>{todo.title}</li>
      ))}
    </ul>
  );
};
export default TodosList;
Let’s save and ensure our code still works!
Rendering the TodoItem Component
Back to our project structure, a TodoItem component will render the actual li item. This component will be rendered in the TodosList and expected the individual todos entry to be passed down. The TodosList component should now look like this:
import TodoItem from '@/components/TodoItem';
const TodosList = ({ todosProps }) => {
  return (
    <ul>
      {todosProps.map((todo) => (
        <TodoItem itemProp={todo} />
      ))}
    </ul>
  );
};
export default TodosList;
In the code, we imported TodoItem, which we will create in a moment, and rendered it in place of the li. After that, we passed the individual todo down via an itemProp prop.
Let’s open the components/TodoItem.jsx file and create a component called TodoItem with the following content:
const TodoItem = ({ itemProp }) => {
  return <li>{itemProp.title}</li>;
};
export default TodoItem;
We received the itemProp prop containing the individual todo entry and then rendered the title as li. Let’s save and ensure our project still works!
The key Prop for List Items
Whenever we render a list of items in React, we must ensure each child has a unique key prop. React uses the key to identify the items and know how to update them in the DOM. Not specifying a key will prompt a console warning like what we currently experience.
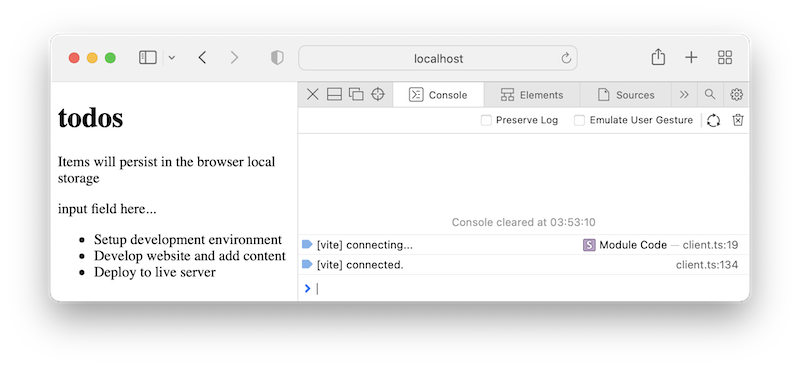
To fix it, let’s open the TodosList component and add a key prop to the JSX inside the map:
{todosProps.map((todo) => (
  <TodoItem key={todo.id} itemProp={todo} />
))}
Here, we are using the id we provided in the todos data. We should not see the console warning again if we save the file.
See the current status of our project:
Good!
Moving on to the next lesson, we will start with React Hooks. We will discuss managing state and other React features in a function component.
I hope you enjoyed this lesson. Please share your thoughts in the comment section if you have questions or contributions.
Next part: Managing State and Side-Effects with React Hooks
continue