
April 04, 2020
. 5 min readLearn React Hooks With a Simple Meme Generator Project
We will be working with a simple meme generator app that is built on the class logic (state and lifecycle method). You will, however, learn how to manage this logic using the React Hooks in a function component.

Earlier on this blog, we created a practical guide to learning the React hooks. There, we discussed the fundamentals of these Hooks and also apply them in a real project.
You'd want to start with that if you are just getting started with React Hooks. In case you are not yet comfortable writing React code, you can follow this step by step guide to React.
That said. In this tutorial, we aim to solidify our React Hooks foundation by working on another simple project called meme generator.
If you are ready, let’s dive in.
What is our goal?
We will be working with a simple meme generator app that is built on the class logic (state and lifecycle method). You will, however, learn how to manage this logic using the React Hooks in a function component.
Here is the starter project for you to clone. So go ahead and clone it using this command.
git clone https://github.com/Ibaslogic/memegenerator
Once the download is done, change directory (cd) inside the project folder and run npm install. This creates a node_module folder consisting of the necessary dependencies.
Finally, start your server with npm start. You should see your app at localhost:3000

What this app does is simple.
The user inputs the top and bottom text through the input fields and then generate random images by clicking on the GENERATE button.
As expected, you should know that the files that make up this UI live in the src folder. If you take a look inside the src/components folder, we have three files. Both the Header.js and MemeApp.js are already a function component. The MemeGenerator.js manages the state and a lifecycle method, hence constructed using a class component.
Let’s optimize the component to use the React Hooks.
So, open the src/components/MemeGenerator.js file. Presently, it has a state object (consisting of four different properties with default values) and class methods including a lifecycle (componentDidMount) at the top level of the component.
You can start by commenting out all the code. Then add this starting code at the top to avoid page break:
import React from 'react';

const MemeGenerator = () => {
  return <div></div>;
};

export default MemeGenerator;
This is our first conversion.
As seen, we are now using a function to construct our component instead of class. Next, let’s manage the state in this function component. So, import the useState Hook from the react module like so:
import React, { useState } from 'react';
const MemeGenerator = () => {
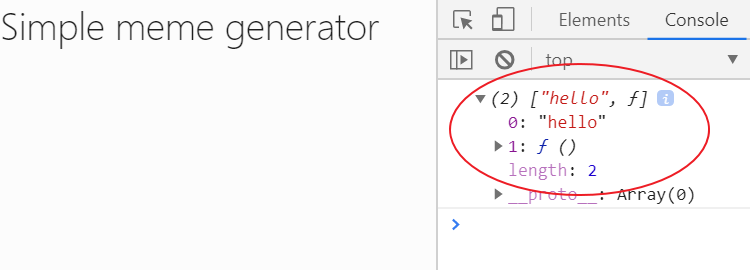
console.log(useState('hello'));
return <div></div>;
};
export default MemeGenerator;
Save the file.
You should know that the useState Hook will return an array containing two items. The current state and a function to update the state.
Recall from the React Hooks for beginners’ guide, we can destructure the returned value of this Hook to have access to its initial state (i.e default value) as well as a callback to modify it.
Something like this.
const [topText, setTopText] = useState('hello');
Where topText holds the initial state i.e hello and the setTopText is a function to update the state. If you apply this in the MemeGenerator component, you should have:
import React, { useState } from 'react';

const MemeGenerator = () => {
  const [inputText, setInputText] = useState({
    topText: '',
    bottomText: '',
  });
  const [randomImage, setRandomImage] = useState(
    'https://i.imgflip.com/26am.jpg'
  );
  const [allMemeImgs, setAllMemeImgs] = useState([]);

  const handleChange = (e) => {
    setInputText({
      ...inputText,
      [e.target.name]: e.target.value,
    });
  };

  const handleSubmit = (e) => {
    e.preventDefault();
    console.log('submitted');
  };

  return (
    <div className="meme-container">
      <form onSubmit={handleSubmit}>
        <input
          type="text"
          name="topText"
          placeholder="Add Top Text"
          value={inputText.topText}
          onChange={handleChange}
        />
        <input
          type="text"
          name="bottomText"
          placeholder="Add Bottom Text"
          value={inputText.bottomText}
          onChange={handleChange}
        />
        <button>Generate</button>
      </form>
      <div className="meme">
        <img src={randomImage} alt="" />
        <h2 className="top">{inputText.topText}</h2>
        <h2 className="bottom">{inputText.bottomText}</h2>
      </div>
    </div>
  );
};

export default MemeGenerator;
Save the file. You should see your app rendered in the frontend. For now, if you click to generate new images, you’ll get a "submitted" text in the console of your browser DevTools.
What’s happening in the code?
Remember, in the class version, we declared a state object where we assigned default values to the object properties. But now, we are doing this using the useState React Hook. Here, instead of defining all the properties in the state object, we have options to split them into multiple state Hook.
But take note, we are keeping related data (the topText and bottomText) together. Now, we don’t have to use this.state to access the current state value. Instead, we are using their respective variables. Likewise, we are now updating the state using the second element returned by the useState Hook.
Also, take note of what’s happening in the handleChange. This function is called whenever the input text field changes. You should know that anytime you are grouping related data in an object, the useState Hook doesn’t merge the old and new state. Instead, it overrides the entire state with that of the current.
To get a clearer picture,
For the meantime, comment-out the …inputText from the function so you have:
const handleChange = (e) => {
  setInputText({
    // ...inputText,
    [e.target.name]: e.target.value,
  });
};
Save your file and try to input the top and bottom text in your application. You’ll notice that they are overriding each other.
So we merged them by passing the entire state using the spread operator (the three dots before inputText) and override the part of it.
Please remember to uncomment the
…inputTextin the function.
Sometimes, manually merging the state might be cumbersome.
So an alternative is to split the topText and bottomText into different useState Hook. But in this case, you will need separate functions to manage the changes in these inputs. This is not going to scale especially if you want to manage many input fields in your application.
Ok. Let’s move on.
The useEffect React Hook
At the moment, if we click the Generate button in our app to display a random image, nothing will happen except that we are logging a simple text in the console. If you take a look at the class version of the code, we are fetching these images using the fetch API in the componentDidMount lifecycle method.
And as you know, this method is not available in a function component.
So we will use another Hook called useEffect.
We have covered much of this in the React Hooks guide, but to reemphasise, you can think of this Hook as componentDidMount, componentDidUpdate, and componentWillUnmount combined.
Let’s see how to apply it in our application. Back in your src/components/MemeGenerator.js file, import useEffect Hook from the react module.
import React, { useState, useEffect } from 'react';
Then add this Hook above the return statement and save your file:
useEffect(() => {
  console.log('test run');
  fetch('https://api.imgflip.com/get_memes')
    .then((response) => response.json())
    .then((response) => setAllMemeImgs(response.data.memes));
});
If you visit the console, you’ll see that this Hook is running infinitely.
What’s happening?
As you can see, this Hook accepts a function that defines the side effect to run. In our case, making HTTP request. By default, it runs not only after the first render but also after every update – i.e when there is a prop or state changes.
In our code, a change occurs. The setAllMemeImgs function updates its state variable when the data is fetched from the endpoint. Thereby causing the Hook to run continuously.
So, we have the responsibility to control it to the logic we want. Remember, we want to replicate the logic of the componentDidMount which should only run once it fetches data for the first time.
To do that, we will add an optional array of dependencies to the Hook so it looks like this:
useEffect(() => {
  console.log('test run');
  fetch('https://api.imgflip.com/get_memes')
    .then((response) => response.json())
    .then((response) => setAllMemeImgs(response.data.memes));
}, []);
With this simple addition, the Hook now depends on the array of dependencies to re-run. But in case there are no dependencies in the array as seen above, React will only execute the Hook once because no data is changing.
With this, you are safe to say that you have the equivalent of componentDidMount when you have an empty array as the second parameter. Now, we can update the handleSubmit function.
const handleSubmit = (e) => {
  e.preventDefault();
  const randNum = Math.floor(Math.random() * allMemeImgs.length);
  const randMemeImgUrl = allMemeImgs[randNum].url;
  setRandomImage(randMemeImgUrl);
};
Save the file.
Comparing this code to that of the class version, you’ll notice that we’ve removed all the occurrence of this.state since it doesn’t apply in the function component. Likewise, the setRandomImage function which update its state value replaces this.setState.
Now check your app and test it. It should work as expected.
Good job!
This is a quick one. I hope you are having fun learning these Hooks. All you need now is to practice as much as possible. If you like this quick tutorial, feel free to share around the web and subscribe for more updates.
You can find the source code here.