
February 13, 2023
. 5 min readDeploy React App to GitHub Pages
Ready to share your app with the world? This guide will show you how to deploy your React app to Gh-Pages. Get started now and publish your React app for free!

When we create React application that we want to share with the world, we can push the project files to GitHub and host them directly from our repository.
This lesson will cover how to deploy a React app to Github pages and access it on the web.
What Is GitHub pages?
GitHub Pages is a static hosting service that takes HTML, CSS, and JavaScript files straight from a repository on GitHub, optionally runs the file through a build process, and publishes a website.
Hosting React applications with GitHub can be straightforward similar to other cloud hosting platforms like Vercel. However, unlike the Vercel implementation, a routing-based React application can be tedious with GitHub pages. This is not to scare you because we’ll simplify the deployment process.
Prerequisite
- A basic understanding of React
- Node.js installed on your computer
- Git installed on your machine
You can check if Git is installed by entering the
git --versionin your terminal. If you don’t have it installed, you can download and install Git for your operating system and set it up.
Clone a Project Repository
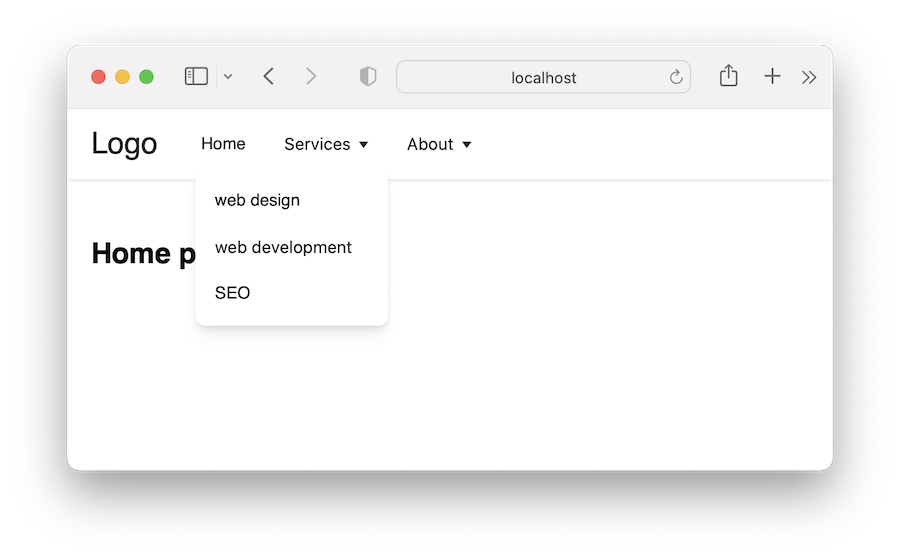
To deploy a React project to production, we need one to work with. If you already have one, follow along. Else, let’s clone a React application with the following command:
git clone https://github.com/Ibaslogic/react-dropdown-starter
Then, move to the project folder, generate the node_modules folder, and start the dev server:
cd react-dropdown-starter
npm install
npm run start
You should see the project open in the browser at port 3000.
We’ve created the React project with the create-react-app CLI. If you want to deploy a React project created with Vite, we recommend you follow this guide.
Deploying Project Files to GitHub
To deploy our project to production, we’ll start by pushing the project files from our machine to GitHub.
Initializing Project as a Git Repository
If you’ve cloned the project from GitHub, you need to first remove the .git folder that comes along with it. From the terminal, navigate to the project directory and run the following shell command:
rm -fr .git
You may need to close your project and reopen it with your code editor.
We can also remove the hidden .git folder manually with File Explorer. We must ensure we enable the option that shows hidden files.
If we now run a git status command, a “fatal: not a git repository…” error in the terminal confirms that the .git folder is deleted.
From there, we can now reinitialize the local git repository using the following command to create a new .git folder:
git init
New projects created with the
create-react-appCLI already have the.gitfolder. For that, we don’t need to reinitialize the git repository with the above command.
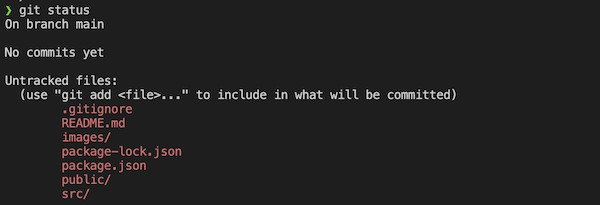
If we check the current status of the working tree with git status, we’ll have the project files in red like so:
Deploy React to a Local Repository
From the terminal, run the following command:
git add .
This command keeps all the working files in the staging area. The dot (.) indicates that we are adding all the files. If we want to add a specific file like index.js, we will run git add index.js.
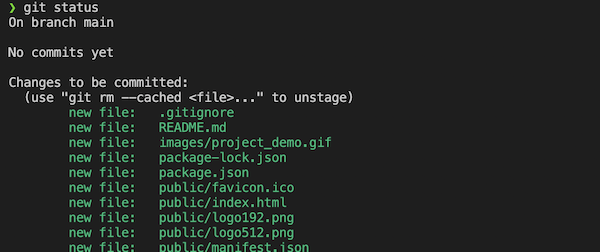
If we now check the status of the working tree, we should have the files in green like so:
Next, we’ll commit all changes to the local repository with this command:
git commit -m 'Add initial commits'
At this point, the project files are now in the local repository. We can now push them to the remote repository.
Deploy React to a Remote Repository
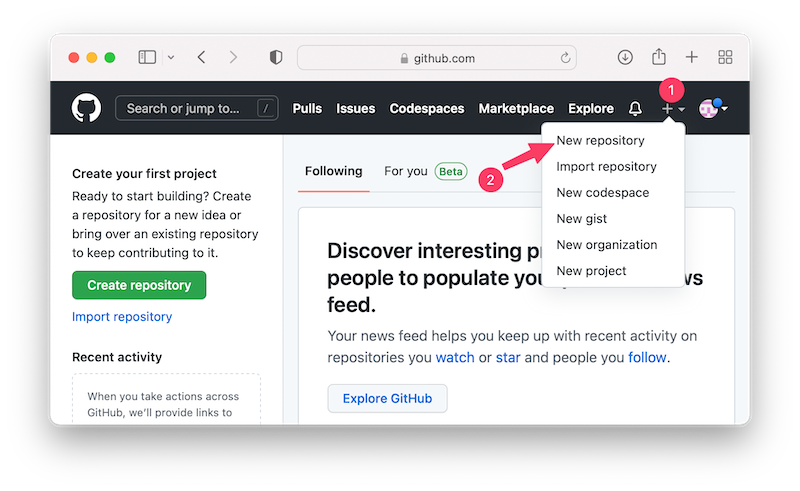
Start by creating a GitHub account if you don’t have one, and create a new repository:
On the new page, we’ll name the repository. In my case, I’ll call it react-deploy-dropdown. Other fields are optional and self-explanatory.
The
create-react-appCLI already included aREADME.mdfile in our project folder. So don't initialize this repository with a README.
Once we’re done, let’s click on the Create repository button. This takes us to a page where we’ll find additional information on what to do.
Find the commands that look like the following and run them in the terminal:
git branch -M main
git remote add origin git@github.com:Ibaslogic/react-deploy-dropdown.git
git push -u origin main
The branch command ensures we’re in the main branch. The remote command adds the repo as the remote repository. Then, the push command pushes the project files to the main branch.
If we reload the GitHub page, we should have our project files pushed to our account.
Deploy Application Files to Gh-Pages
Back to the terminal, let’s install a package to create a gh-pages branch on GitHub. Run the following command:
npm install gh-pages --save-dev
After that, let’s open the package.json file in the root directory and add the homepage property at the top level:
"homepage": "https://username.github.io/repository-name",
This will be the URL to the project homepage.
Let’s modify the above URL to include our GitHub username and repository name. In my case, the package.json file now looks like this:
{
  "name": "react-deploy-dropdown",
  "version": "0.1.0",
  "private": true,
  "homepage": "https://ibaslogic.github.io/react-deploy-dropdown",
  "dependencies": {
    // ...
  },
  // ...
}
Next, locate the scripts property in the package.json file and add a predeploy and deploy scripts command:
"scripts": {
  "start": "react-scripts start",
  "build": "react-scripts build",
  "test": "react-scripts test",
  "eject": "react-scripts eject",
  "predeploy": "npm run build",
  "deploy": "gh-pages -d build"
},
Save the file. And then, run the following command to push the project to gh-pages:
npm run deploy
The above command does two things:
- It triggers a
predeploythat runs thebuildcommand to create a build folder in the root directory. This folder will contain production-ready files that will be deployed. - It creates a branch named gh-pages in the GitHub repo to host the application files.
Accessing the Site URL
Once the project is successfully published, we can visit the URL assigned to the homepage property in the package.json file to see our application.
Alternatively, we can go to the Settings tab of our GitHub repository. Then, locate the Pages menu to see the site URL.
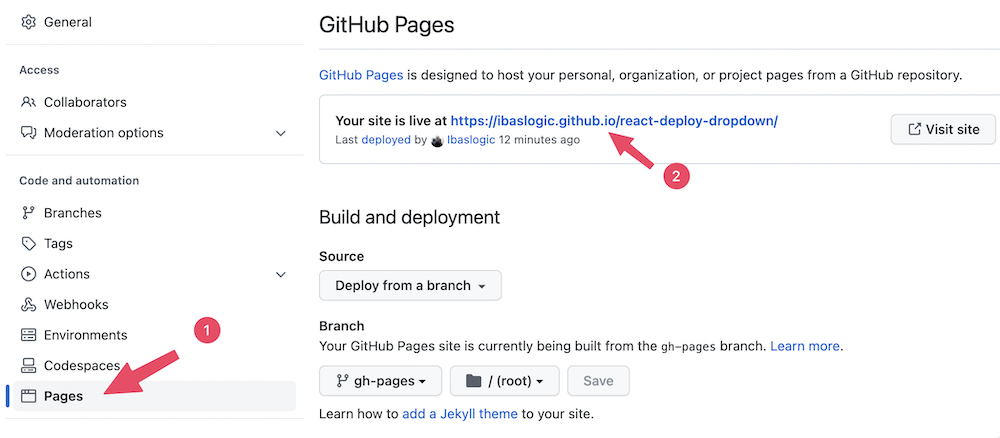
We’ll see the app’s custom error page if we click on the link. And if we directly access a route like /about, we’ll get an error page from the hosting server.
This error is because we request a URL path that the GitHub pages server knows nothing about. If we had created a React project without implementing routing, the above procedure should be enough. However, we need to do more for a routing-based React application with create-react-app CLI.
Handling Routing With HashRouter
By default, gh-pages doesn’t support client-side routers that use the HTML5 history like the BrowserRouter. We’ve used the BrowserRouter in the src/index.js file like so:
root.render(
  <React.StrictMode>
    <BrowserRouter>
      <App />
    </BrowserRouter>
  </React.StrictMode>
);
In the React router lesson, we briefly mentioned the HashRouter and talked about how it attaches a # to the URL, making it unattractive when compared to the BrowserRouter:
http://yourapp.com/#/about
However, it is easier to use and supported by gh-pages without any configuration.
To use it, let’s simply replace the BrowserRouter in the src/index.js with HashRouter:
// ...
import { HashRouter } from 'react-router-dom';

const root = ReactDOM.createRoot(document.getElementById('root'));
root.render(
  <React.StrictMode>
    <HashRouter>
      <App />
    </HashRouter>
  </React.StrictMode>
);
Save the file and push the project to gh-pages with the npm run deploy command. After a successful rebuild, the project should now work as expected.
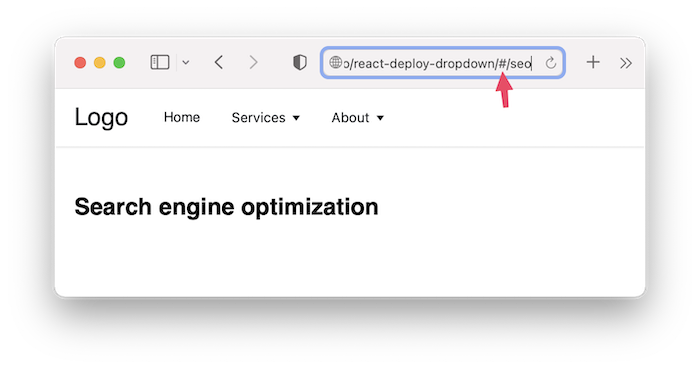
As we can see in the image, we have a # attached to the URL. In most cases, we wouldn’t want that.
Handling Routing With BrowserRouter
If you want a clean URL without minding adding a bit more code, let’s go back to the src/index.js file and revert the router type to BrowserRouter.
The basename prop
We’ll add a basename prop to the BrowserRouter to define the base URL for the project in production:
// ...
import { BrowserRouter } from 'react-router-dom';

const root = ReactDOM.createRoot(document.getElementById('root'));
root.render(
  <React.StrictMode>
    <BrowserRouter basename={process.env.PUBLIC_URL}>
      <App />
    </BrowserRouter>
  </React.StrictMode>
);
Save the file!
The process.env.PUBLIC_URL will match the repository name we attached to the project homepage property in the package.json file. In our case, it will match the react-deploy-dropdown.
Now, with this configuration, we’ll have "/react-deploy-dropdown" attached to the production index page, which will render the home content properly.
Setting Up a Redirects to index.html Page
Whenever we directly access a route or manually reload a route, we want to redirect to the index.html file. We’ll also configure a 404.html file to keep the basename in the path after redirect.
Let’s create a 404.html file in the /public folder and copy over the [404.html](https://github.com/rafgraph/spa-github-pages/blob/gh-pages/404.html) file to the newly created file. Then, we need to change the value assigned to pathSegmentsToKeep to 1. Let’s ensure we save the file.
Next, let's copy the redirect script (lines: 20-43) in the index.html to the <head> section in our /public/index.html file. Please save the file!
We can now push the project to gh-pages with the npm run deploy command. Let’s give the build process a few minutes before we revisit the live URL.
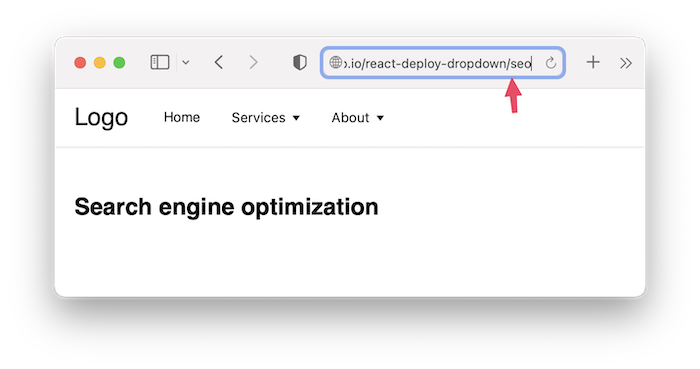
As we can see in the image, we no longer have a # attached to the URL.
You may also want to push the updated code to your GitHub repo:
git add .
git commit -m 'Set up a redirects to index.html page'
git push
Conclusion
While we simplified the process in this lesson, deploying a routing-based React application created with CRA can be challenging when deploying to Gh-pages. If you enjoyed reading this guide, endeavor to share it around the web.
Consider reading this tutorial for deploying a React app built with Vite.